Unleash the power of Google Tag Manager with this comprehensive guide for beginners. Revolutionize your website tracking and analytics!

Image courtesy of via DALL-E 3
Table of Contents
- Introduction to Google Tag Manager
- Getting Started with Google Tag Manager
- Understanding Tags, Triggers, and Variables
- Creating Your First Tag
- Advanced Tag Implementation
- Managing and Organizing Tags
- Common Mistakes and How to Avoid Them
- Benefits and Best Practices
- Conclusion
- Frequently Asked Questions (FAQs)
Introduction to Google Tag Manager
Google Tag Manager is a powerful tool for managing the tags on your website without the need for coding skills. But what exactly is Google Tag Manager, and why should beginners like you use it? Let’s explore these questions to better understand the benefits of this handy tool.
What is Google Tag Manager?
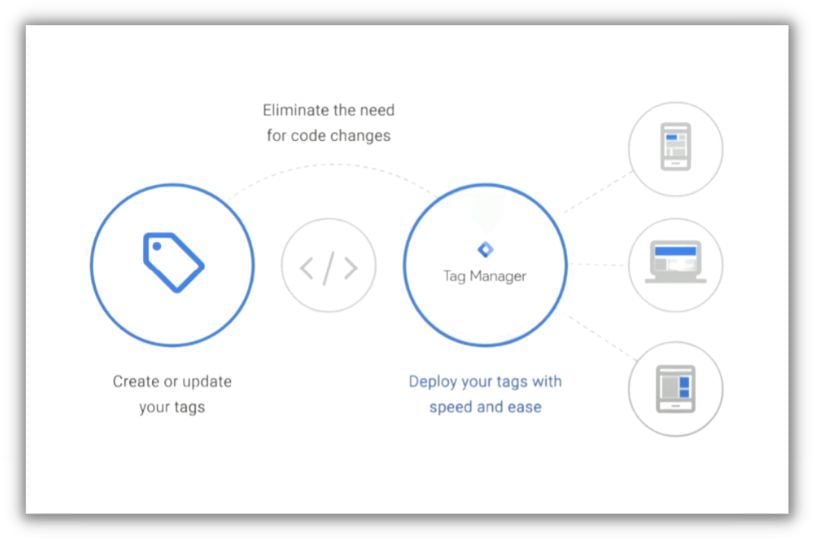
Google Tag Manager, often abbreviated as GTM, is a tool that simplifies the process of adding and updating tags on your website. But what are tags? Think of them as pieces of code that help track user interactions on your site, such as clicks, form submissions, and page views. With Google Tag Manager, you can manage these tags from one central platform without having to manually insert the code on each page of your website. This makes tracking user behavior and collecting data a breeze!
Why Should You Use It?
Now that you know what Google Tag Manager is, let’s talk about why you, as a beginner, should consider using it. One of the significant advantages of Google Tag Manager is its ease of use. Instead of relying on developers to add or edit tags, you can do it yourself with a user-friendly interface. This can save you time and effort, allowing you to focus on other aspects of your website.
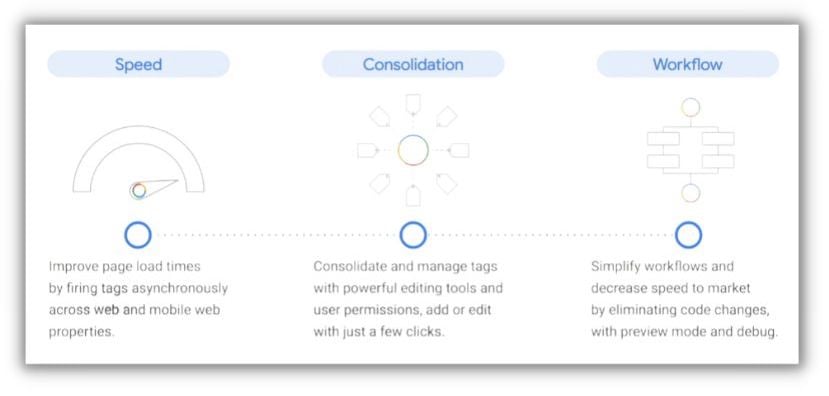
Additionally, Google Tag Manager can help improve your website’s performance by reducing the number of tags firing on each page load. This means faster load times for your site visitors and a smoother user experience overall. With Google Tag Manager, you have more control over your website’s tracking and analytics, making it an essential tool for any website owner.
Getting Started with Google Tag Manager
For beginners looking to dive into the world of website analytics and tracking, Google Tag Manager is the perfect tool to simplify the process. This section will guide you through the initial steps of setting up Google Tag Manager on your website, making the entire process easy and straightforward.
Setting Up a Google Tag Manager Account
Creating a Google Tag Manager account is the first step in harnessing the power of this tool. Simply head to the Google Tag Manager website and sign up for an account. Once you’ve completed the registration process, you’ll be prompted to create a container for your website.
Installing Google Tag Manager on Your Website
After setting up your account and container, the next step is to install Google Tag Manager on your website. This involves adding a unique GTM code snippet to your site’s HTML. Don’t worry, no coding skills are required! Google provides step-by-step instructions on how to add this code, making the process quick and easy.
Understanding Tags, Triggers, and Variables
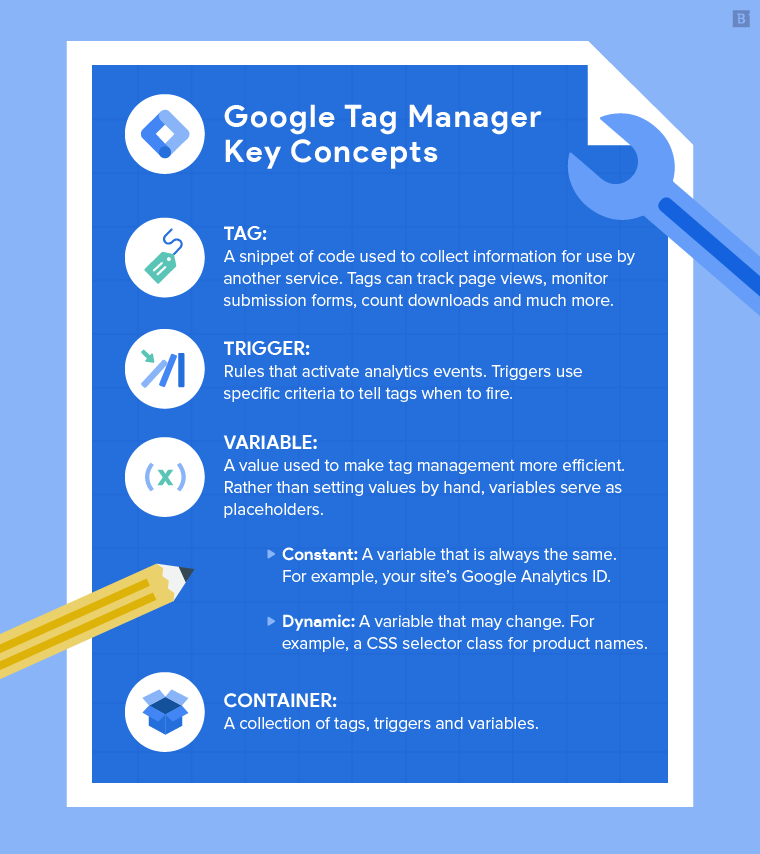
In Google Tag Manager, there are three essential components that work together to help you manage tags effectively. Let’s break down what tags, triggers, and variables are and how they play a vital role in optimizing your website.

Image courtesy of www.brafton.co.uk via Google Images
Tags: What They Are and How They Work
Tags are snippets of code that track specific actions on your website, like page views or form submissions. These tags provide valuable data that can help you understand user behavior and optimize your site for better performance. For example, Google Analytics tags track how users interact with your site and provide insights into your audience’s preferences.
Triggers: Making Tags Fire
Triggers are conditions that determine when a tag should be activated. They act as the signal for tags to fire based on certain actions or events on your website. For instance, you can set up a trigger to fire a tag when a user submits a contact form or clicks on a specific button. Triggers ensure that tags are only triggered when the specified criteria are met.
Variables: Adding Flexibility to Tags
Variables in Google Tag Manager add flexibility to your tags and triggers. They allow you to customize and modify your tags based on dynamic values. For example, you can use variables to capture the value of a form field or the URL of the page a user is on. By incorporating variables, you can make your tags and triggers more responsive to different scenarios on your website.
Creating Your First Tag
Now that you have a basic understanding of Google Tag Manager, it’s time to dive into creating your first tag. Tags are essential elements in GTM that help you track various activities on your website. Follow these simple steps to create and deploy your first tag.
Step-by-Step Tag Creation
To create a tag in Google Tag Manager, follow these steps:
- Log in to your GTM account and select the container you want to work on.
- Go to the Tags section and click on “New Tag.”
- Choose a tag type, such as Google Analytics – Universal Analytics.
- Configure the tag by entering the necessary tracking ID or settings.
- Set up triggers to determine when the tag should fire, such as on all pages or specific URLs.
- Name your tag for easy identification.
- Save your tag and submit it for publishing.
By following these steps, you can create a basic tag like a Google Analytics tracking tag and start monitoring your website’s performance.
Previewing and Debugging Tags
After creating your tag, it’s essential to check if it’s working correctly. Google Tag Manager offers a preview and debug mode to help you test your tags before deploying them live on your website.
To preview and debug your tags:
- Click on the “Preview” button in GTM to enable the debugging mode.
- Open your website in a new tab to see the GTM debug console.
- Interact with your website to trigger the tag and check if it fires as expected.
- Review the tag information and debug events to ensure everything is set up correctly.
By utilizing the preview and debug mode, you can catch any issues with your tag implementation and make necessary adjustments before going live. This ensures accurate tracking and data collection on your website.
Advanced Tag Implementation
In the world of Google Tag Manager, there are more advanced tagging scenarios that you can explore beyond the basics. Let’s delve into some of the more complex tagging options available to you.

Image courtesy of www.linkedin.com via Google Images
Custom HTML Tags
Custom HTML tags allow you to add specific code snippets to your website without having to directly manipulate the site’s source code. This can be useful for various tracking pixels, conversion tracking scripts, or any other custom functionalities you want to implement. To create a custom HTML tag in Google Tag Manager:
1. Go to your Google Tag Manager account and click on “Tags”.
2. Select “New” to create a new tag.
3. Choose “Custom HTML” as the tag type.
4. Paste your custom HTML code in the provided field.
5. Configure the trigger to determine when the tag should fire.
6. Save your tag and publish your changes.
Using Built-in Tag Templates
Google Tag Manager offers a variety of built-in tag templates that you can use for common tracking scenarios. These templates are preconfigured to work with popular tools like Google Analytics, Facebook Pixel, and more. To use a built-in tag template:
1. Go to your Google Tag Manager account and click on “Tags”.
2. Select “New” to create a new tag.
3. Choose a tag template from the list of available options.
4. Fill in the required fields or configurations for the selected template.
5. Configure the trigger to determine when the tag should fire.
6. Save your tag and publish your changes.
By exploring custom HTML tags and utilizing built-in tag templates, you can take your tagging game to the next level and implement more sophisticated tracking and analytics on your website.
Remember, with Google Tag Manager, the possibilities are endless!
Managing and Organizing Tags
When you have multiple tags, triggers, and variables in Google Tag Manager, it can quickly become overwhelming to keep track of everything. That’s where folders come in handy. Folders allow you to group related items together, making it easier to find and manage them.
Creating folders in Google Tag Manager is simple. Just click on the “New” button and select “Folder” from the dropdown menu. Give your folder a descriptive name, such as “Google Analytics Tags” or “Homepage Triggers.” Then, you can drag and drop items into the folder to keep things organized.
By using folders effectively, you can streamline your workflow, improve collaboration with team members, and ensure that your tags are structured in a logical and easy-to-navigate way.
Naming Conventions
Consistent and clear naming conventions are essential for efficient tag management in Google Tag Manager. When you give your tags, triggers, and variables descriptive names, it becomes much easier to understand their purpose at a glance.
Here are a few tips for creating effective naming conventions:
- Use descriptive names that clearly indicate the function of the tag, trigger, or variable (e.g., “GA – Homepage View Tag”).
- Avoid using abbreviations or acronyms that may be unclear to others.
- Consider adding a prefix to group related items together (e.g., all Google Analytics tags start with “GA – “).
- Update names as needed to reflect any changes or updates to the tag, trigger, or variable.
By following these naming conventions, you can save time, reduce confusion, and ensure that everyone on your team is on the same page when it comes to managing and organizing tags in Google Tag Manager.
Common Mistakes and How to Avoid Them
One common mistake beginners encounter when using Google Tag Manager is tags not firing as expected. This issue may arise due to incorrect trigger configurations or conflicts with other tags on the website. To troubleshoot this problem, check the trigger settings for the tag in question. Ensure that the trigger conditions are accurately defined to activate the tag under the intended circumstances. Additionally, review the order of your tags to rule out any conflicts that may prevent the desired tag from firing.

Image courtesy of www.wordstream.com via Google Images
Debugging Tips
Debugging is a crucial aspect of resolving issues with Google Tag Manager implementation. If you encounter problems with tags not firing or tracking data inaccurately, utilize the built-in preview and debug mode. This feature allows you to simulate tag firing events on your website and inspect the data layers to identify any errors. By using the debug tools provided by Google Tag Manager, you can efficiently troubleshoot and diagnose issues to ensure the proper functioning of your tags.
Benefits and Best Practices
Google Tag Manager offers numerous benefits to website owners, especially those who are new to the world of tracking and analytics. One of the key advantages is the ability to streamline the process of managing tags on a website. Tags are snippets of code that help track user interactions and behavior on a site. With Google Tag Manager, you no longer need to manually insert these tags into your website’s code, saving you time and effort.
Additionally, Google Tag Manager provides a centralized platform for managing all your tags, triggers, and variables. This centralized approach ensures that your tracking setup is organized and easy to navigate. By using GTM, you can gain valuable insights into your website’s performance and user behavior without getting bogged down in complex coding processes.
Tips for Effective Use
For beginners looking to make the most of Google Tag Manager, here are some tips to help you navigate the tool effectively:
1. Plan Your Tags: Before diving into creating tags, take the time to plan out your tracking strategy. Define what you want to track and set clear objectives for each tag.
2. Use Descriptive Names: When naming your tags, triggers, and variables, opt for clear and descriptive names. This will make it easier to identify and manage them later on.
3. Test Tags Before Publishing: Utilize Google Tag Manager’s preview and debug mode to test your tags before publishing them live on your website. This helps ensure that your tags are firing correctly and tracking the data you need.
4. Regularly Review and Update: As your website evolves, so should your tracking setup. Regularly review your tags and tracking parameters to ensure they align with the current goals of your website.
By following these best practices, beginners can navigate Google Tag Manager with confidence and optimize their website tracking for improved insights and performance.
Conclusion
In this guide, you have learned the ins and outs of Google Tag Manager and how it can revolutionize the way you manage tags on your website. By leveraging this powerful tool, you can streamline your tag management process, save time, and enhance your website’s performance.

Image courtesy of www.wordstream.com via Google Images
Recapping Google Tag Manager
Throughout this guide, we have covered the basics of Google Tag Manager, from its purpose and advantages to setting up your account and deploying your first tag. You now have the foundation to take your website tracking and analytics to the next level.
Encouragement to Start
Now that you have a solid understanding of Google Tag Manager, it’s time to put your knowledge into action. Don’t be afraid to dive in and start exploring the endless possibilities that GTM offers. Experiment with different tags, triggers, and variables to optimize your website’s performance and gain valuable insights into your audience.
Remember, Google Tag Manager may seem overwhelming at first, but with practice and perseverance, you’ll soon master this essential tool and unlock its full potential for your online presence. So, what are you waiting for? Start using Google Tag Manager today and watch your website thrive!
Want to turn these SEO insights into real results? Seorocket is an all-in-one AI SEO solution that uses the power of AI to analyze your competition and craft high-ranking content.
Seorocket offers a suite of powerful tools, including a Keyword Researcher to find the most profitable keywords, an AI Writer to generate unique and Google-friendly content, and an Automatic Publisher to schedule and publish your content directly to your website. Plus, you’ll get real-time performance tracking so you can see exactly what’s working and make adjustments as needed.
Stop just reading about SEO – take action with Seorocket and skyrocket your search rankings today. Sign up for a free trial and see the difference Seorocket can make for your website!
Frequently Asked Questions (FAQs)
What is a Tag?
In Google Tag Manager, a tag is like a messenger that delivers information from your website to analytics tools, marketing platforms, or other third-party services. Think of it as a way to track specific actions on your website, such as button clicks, form submissions, or page views.
How Do I Know If My Tag Is Working?
You can ensure that your tag is firing correctly by using the preview mode in Google Tag Manager. This feature allows you to simulate how tags fire on your website before actually publishing them. By testing your tags in the preview mode, you can verify that they are working as intended.
Can I Use Google Tag Manager for Free?
Yes, Google Tag Manager is a free tool provided by Google. You can easily sign up for an account and start using it to manage your website tags without any cost. This makes it accessible for businesses and individuals looking to improve their website tracking and performance.
Is Google Tag Manager Difficult to Learn?
While Google Tag Manager may seem intimidating at first, especially for beginners, it is designed to be user-friendly and accessible. With practice and learning the basics, you can quickly grasp how to use Google Tag Manager to effectively manage your website tags without the need for coding knowledge. It may take some time to master, but it’s definitely achievable.


